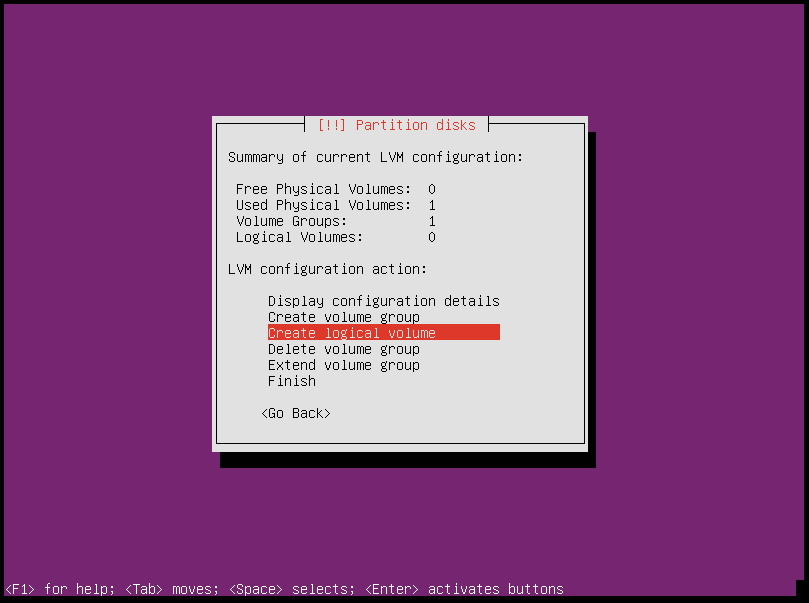
Provisioning
For the initial deployment of the management plane and the control plane of OSISM, the systems must be pre-provisioned with Ubuntu 22.04.
Data plane nodes can be automatically provisioned after the initial deployment and do not need to be pre-provisioned.
It is recommended not to install the initial nodes of the management plane and the control plane manually. An ISO image is provided for this purpose which automatically provisions a node. The ISO image is available for download at https://github.com/osism/node-image.
There are different variants of the ISO image. The variants differ in the disc layout. The available variants are described in the README file of https://github.com/osism/node-image repository.
If none of the provided variants is suitable, this chapter also describes the manual installation with the help of the Ubuntu 22.04 live ISO image.
Manual installation
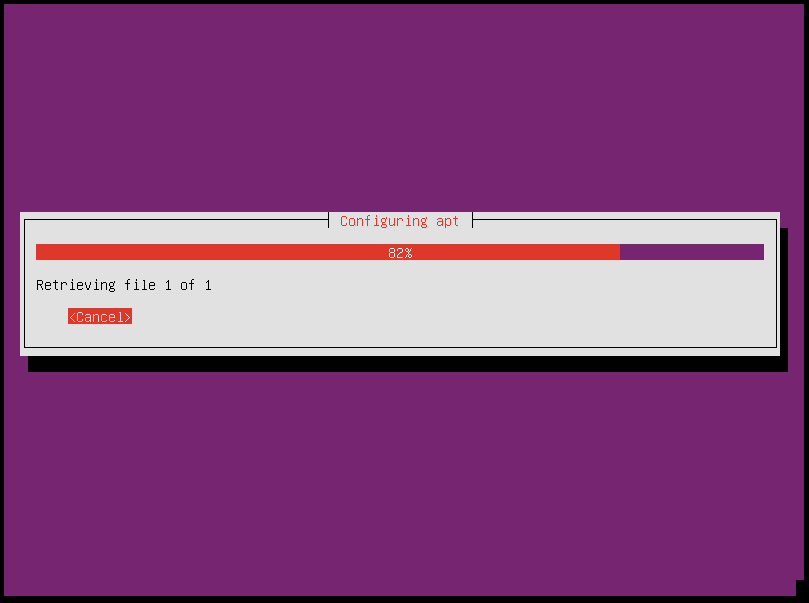
The manual installation of a system is described in this section. The manual installation is possible without network connectivity.
Download the latest ISO image for Ubuntu 22.04 from https://www.releases.ubuntu.com/22.04/
Use the
ubuntu-22.04.1-live-server-amd64.isoimageThe version number may be different, always use the latest available version of 22.04 LTS
Note
The screenshots and instructions were created with Ubuntu 20.04. It is similar with Ubuntu 22.04, but the screenshots differ.
Choose
Englishas languageChoose
Install Ubuntu ServerChoose
Englishas language (again)Choose your location (e.g.
Germany)Choose
en_US.UTF-8as localeChoose the keyboard layout from a list, use
English (US)Choose and configure the primary network interface
Depending on the environment, the network may not work at this point. Then select any interface and then select
Do not configure the network at this timein the next step.
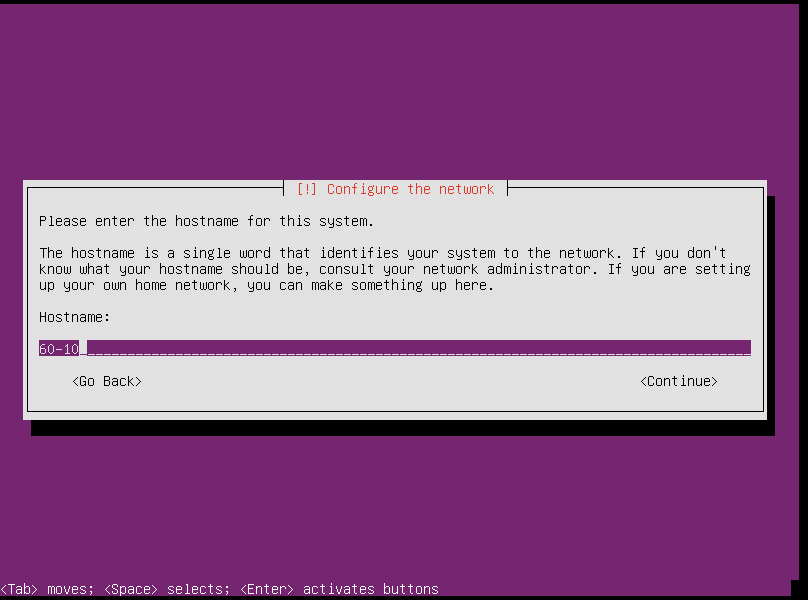
Set the hostname (the hostname is
nodeand notnode.systems.osism.xyz)Adapt the host name accordingly as you need it yourself.
nodeis only an example.
Set
osismas full name for the new userSet
osismas the username for the accountThe later used operator user
dragonis created during the bootstrap and should not be created during the installation.
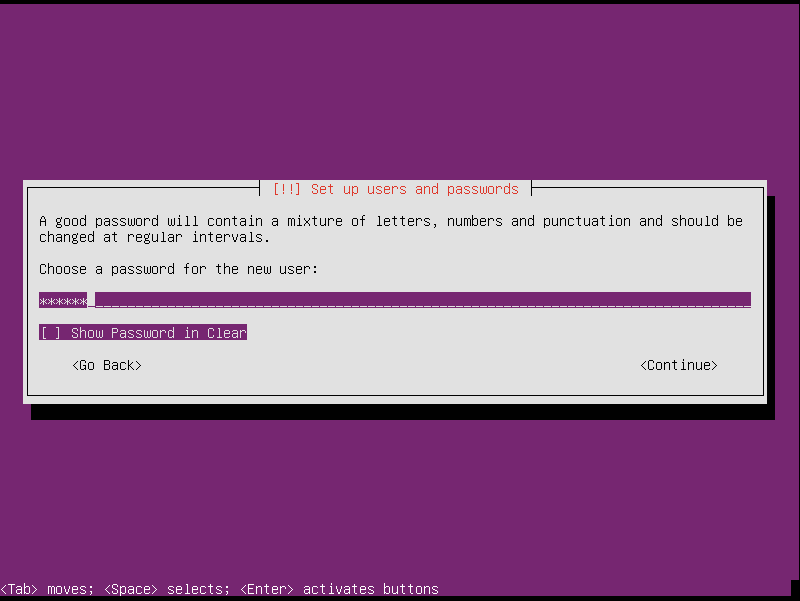
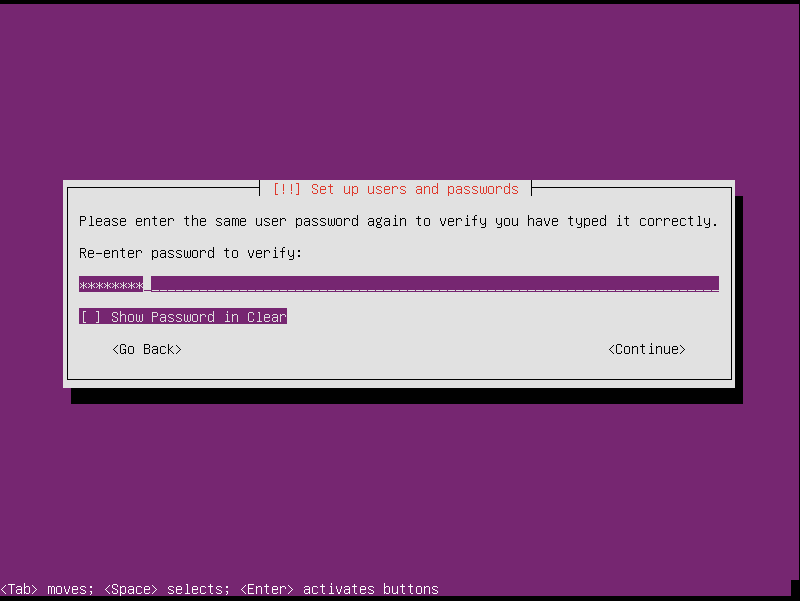
Set a password for the account
The account is only needed initially and can be deleted after completion of the bootstrap.
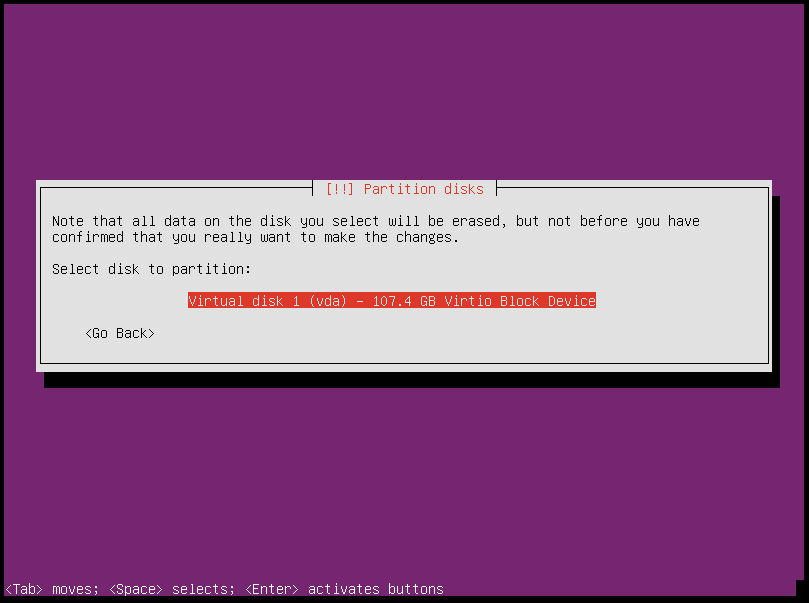
Choose
Manualas partitioning method and execute the partitioning according to company specificationsDetails can be found in section Node Partitioning
Choose
No automatic updatesChoose
OpenSSH serveras software to installNote
Do not install any other software component. Everything you need will be installed later by OSISM. In particular, it is not necessary to install a desktop environment.
After completion, restart the system
Note
python3-minimal must be installed on the systems.
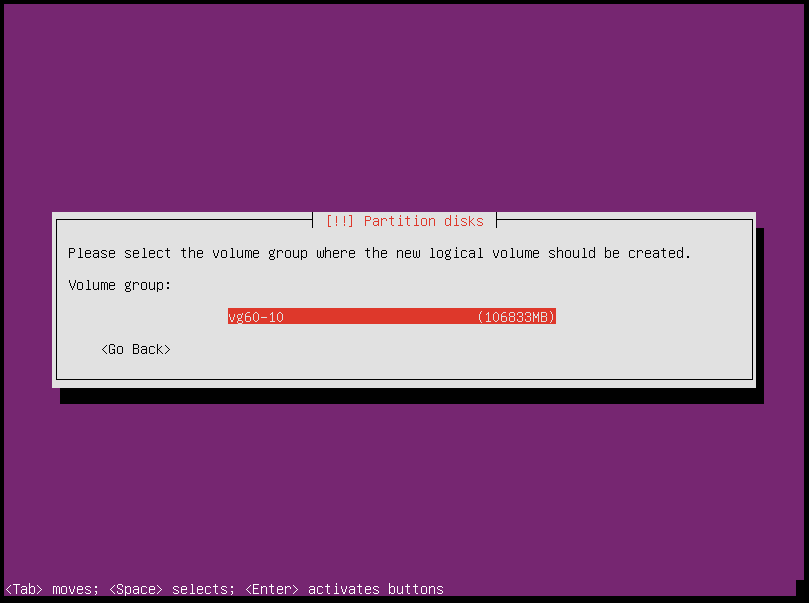
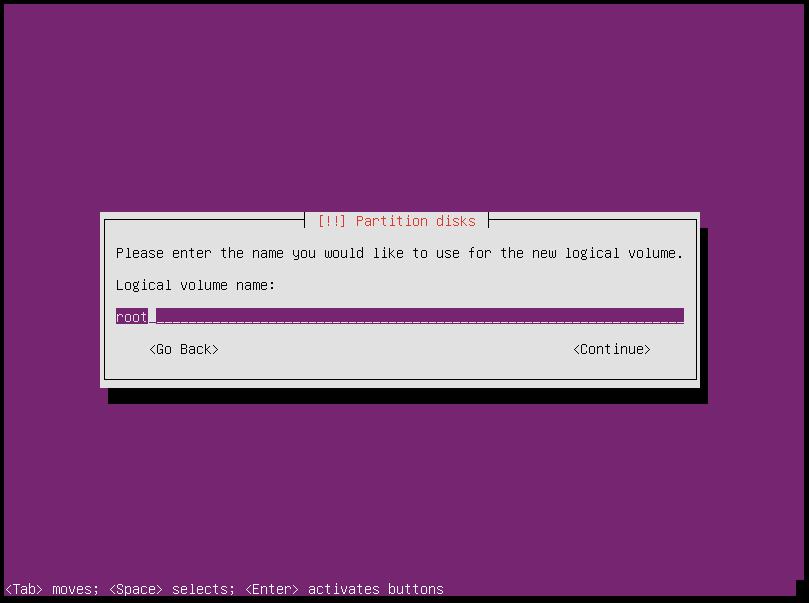
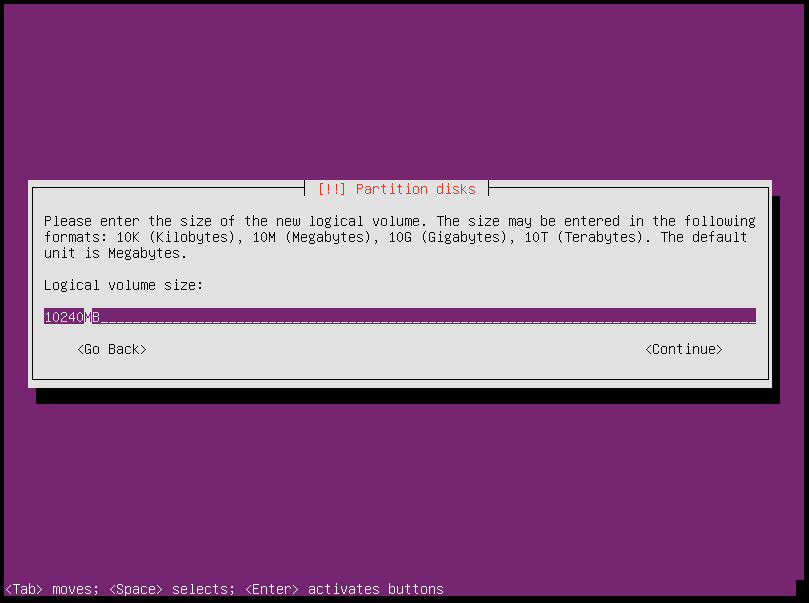
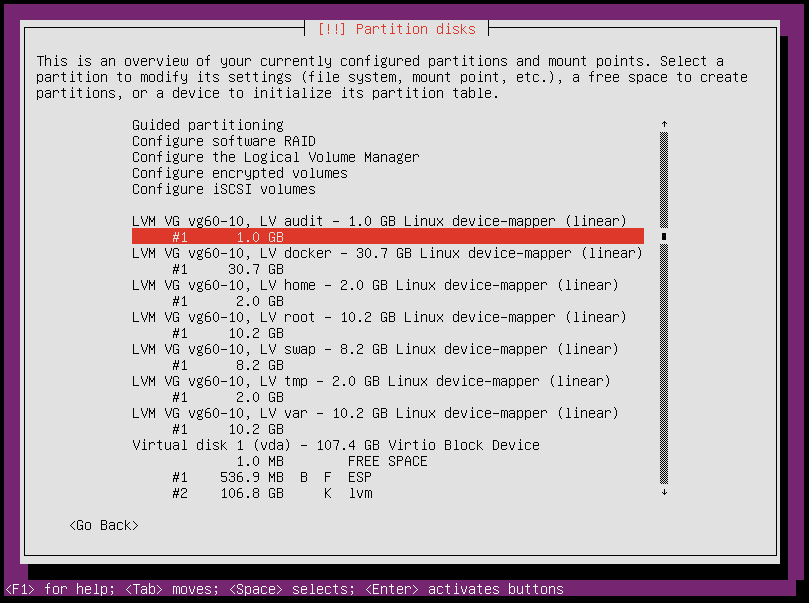
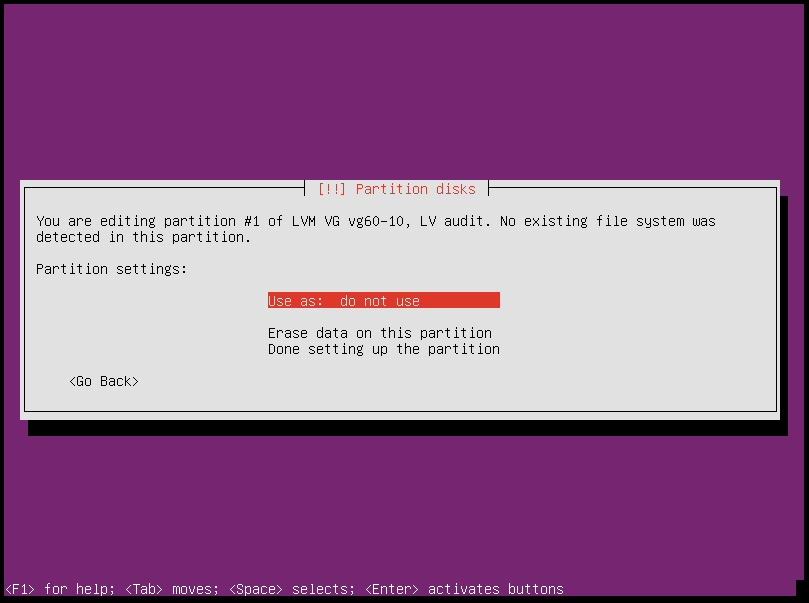
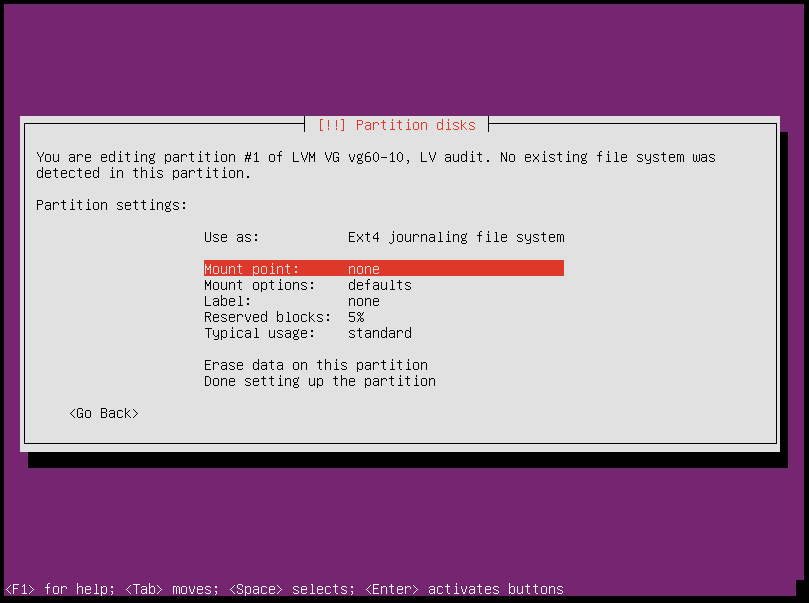
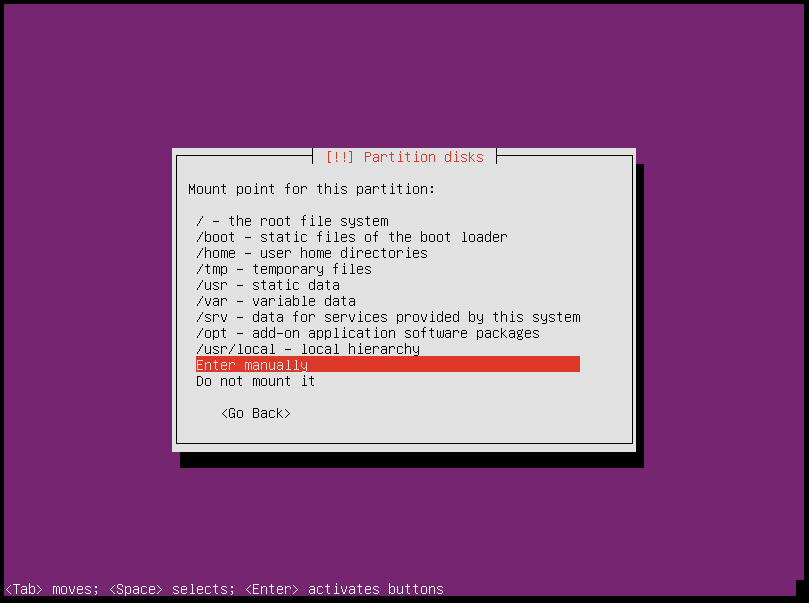
Node Partitioning
The use of a UEFI is recommended
The use of a RAID is recommended
Note
We prefer the use of software RAIDs to make us less dependent on hardware. But there is nothing against using hardware RAIDs.
The use of a LVM2 is recommended
systemis recommended as the name for the volume group
Note
Dedicated disks may be provided for
/var/lib/dockeron the controller nodes. In this case, do not use an LV for/var/lib/dockerbut the devices provided for it.Do not configure devices that are not required for the operating system
The use of own file systems for the following mountpoints is recommended. The minimum size and a recommended name for the logical volume are noted.
/(10 GByte, logical volumeroot)
/home(2 GByte, logical volumehome)
/tmp(5 GByte, logical volumetmp)
/var/lib/ceph(50 GByte, logical volumeceph) (optional for storage nodes)
/var/lib/docker(30 GByte, logical volumedocker, do not set thenosuidflag on/var/lib/docker)
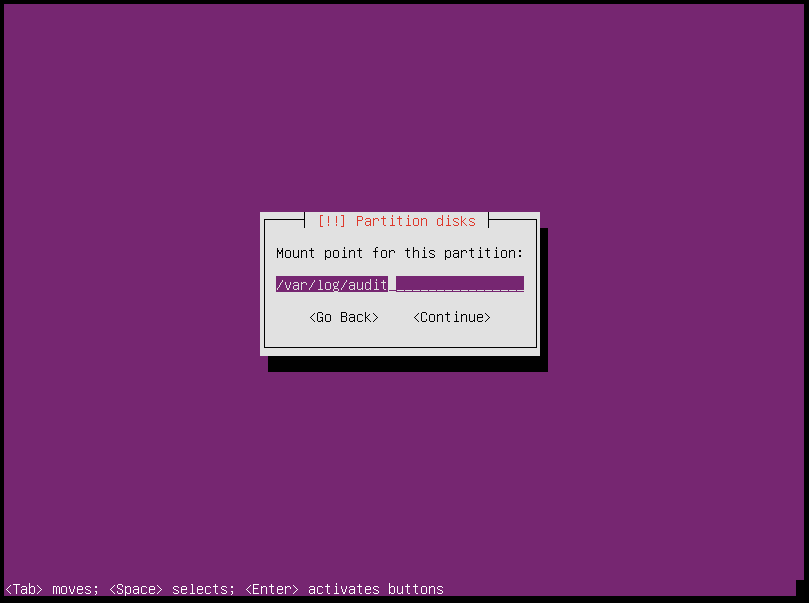
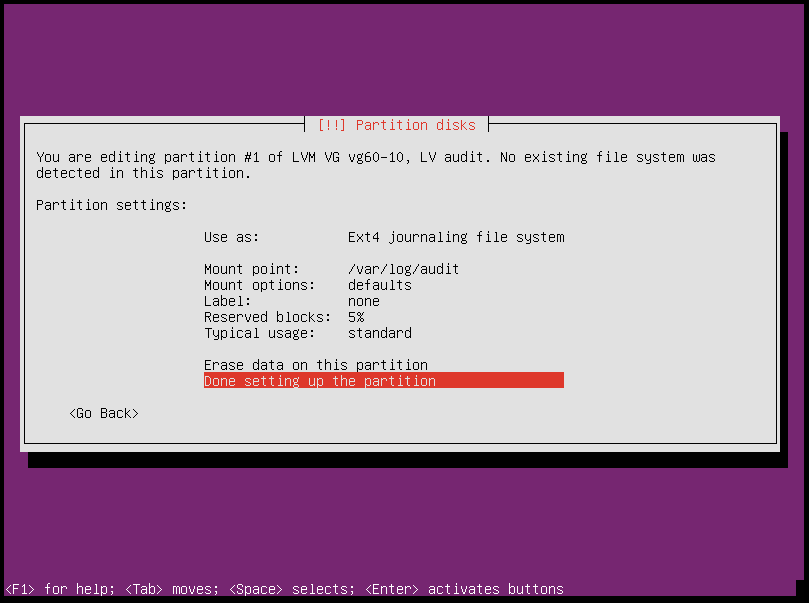
/var/log/audit(1 GByte, logical volumeaudit)
/var(10 GByte, logical volumevar)
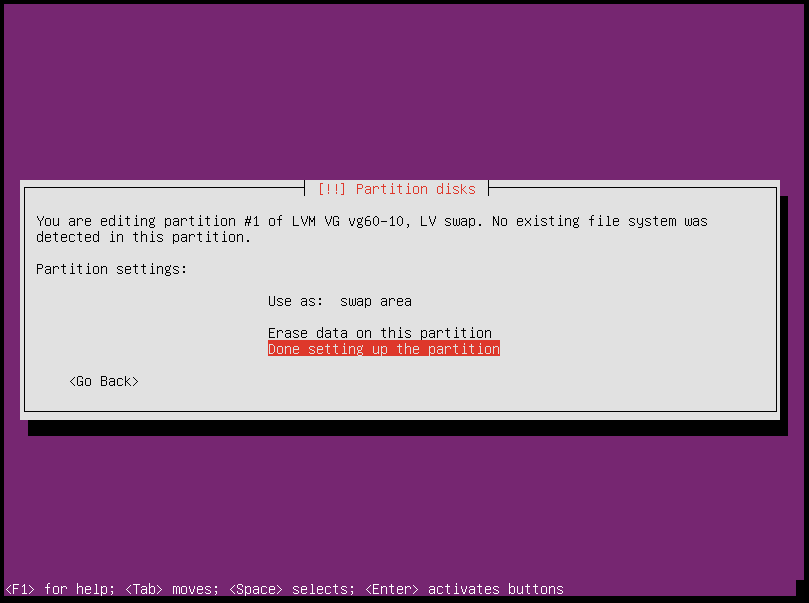
swap(min 8 GByte, logical volumeswap)Note
The size of the individual partitions is minimal. Depending on the node type, the individual partitions should be made larger. This applies in particular to
/var/lib/docker. On controllers at least 100 GByte should be used.A later enlargement is possible during operation.
# lvextend -L +10G /dev/mapper/system-docker
# resize2fs -p /dev/mapper/system-docker
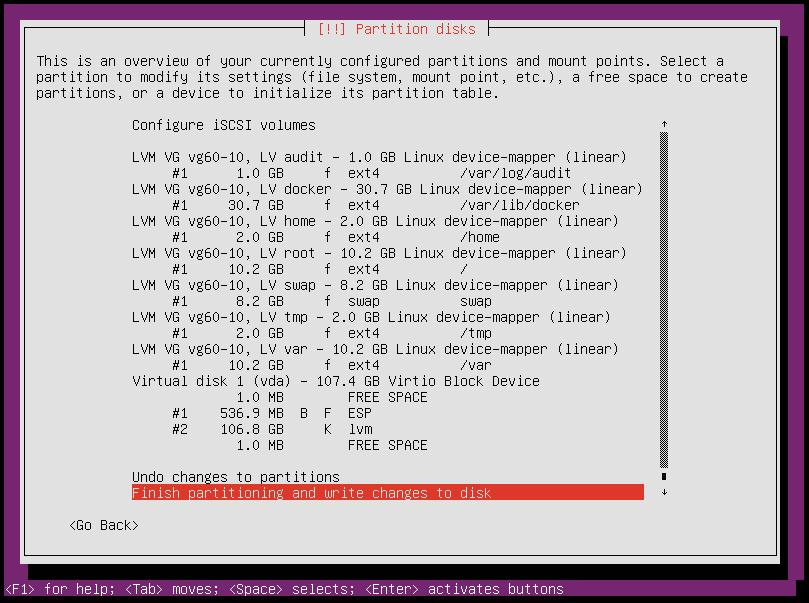
The following is a sample view from the Ubuntu installer. This view may vary depending on the environment.
Note
When using XFS as the file system for /var/lib/docker, note the following: Running on XFS
without d_type support now causes Docker to skip the attempt to use the overlay or overlay2 driver.
https://docs.docker.com/storage/storagedriver/overlayfs-driver/
Screenshots
Step by step of manual installation with screenshots.
Boot via CD-ROM/ISO Ubuntu and choose
Install Ubuntu Server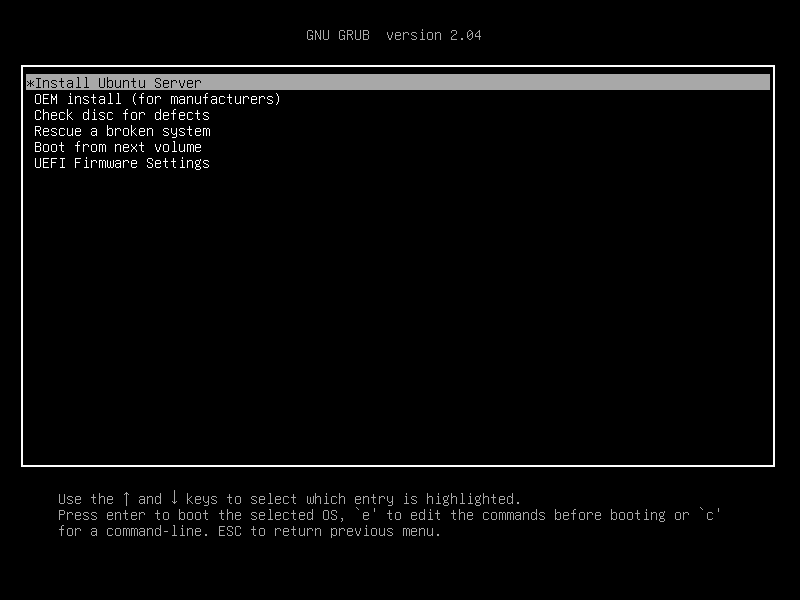
Select language
English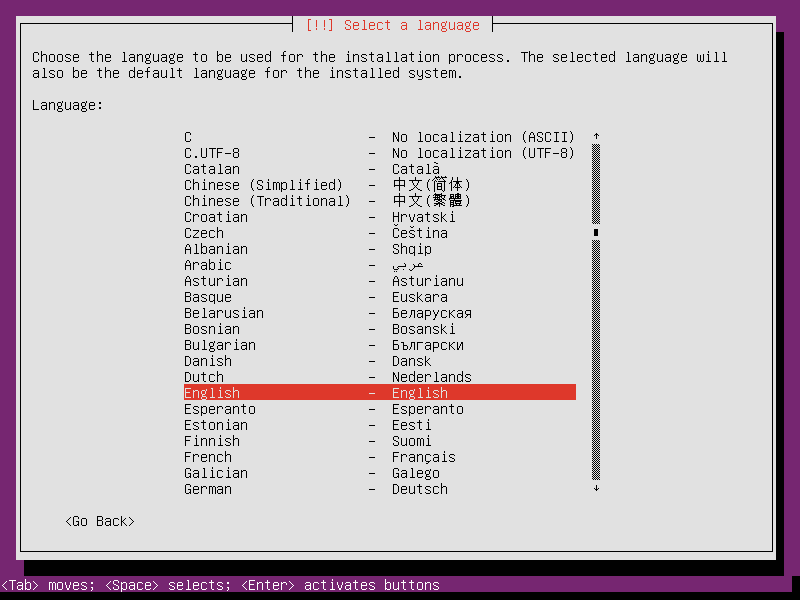
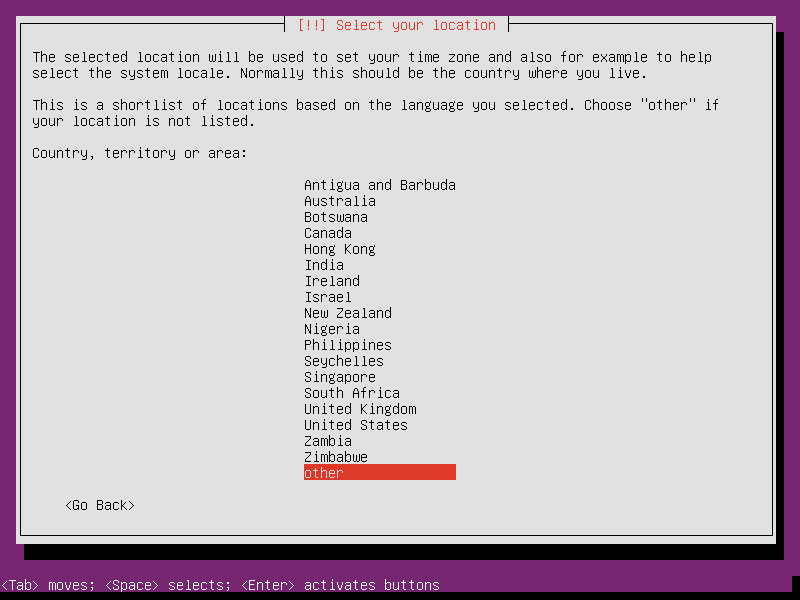
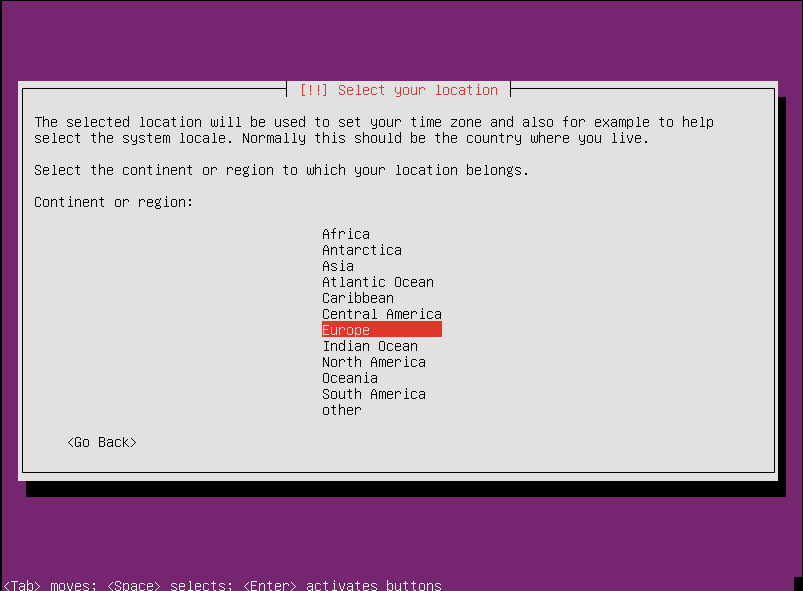
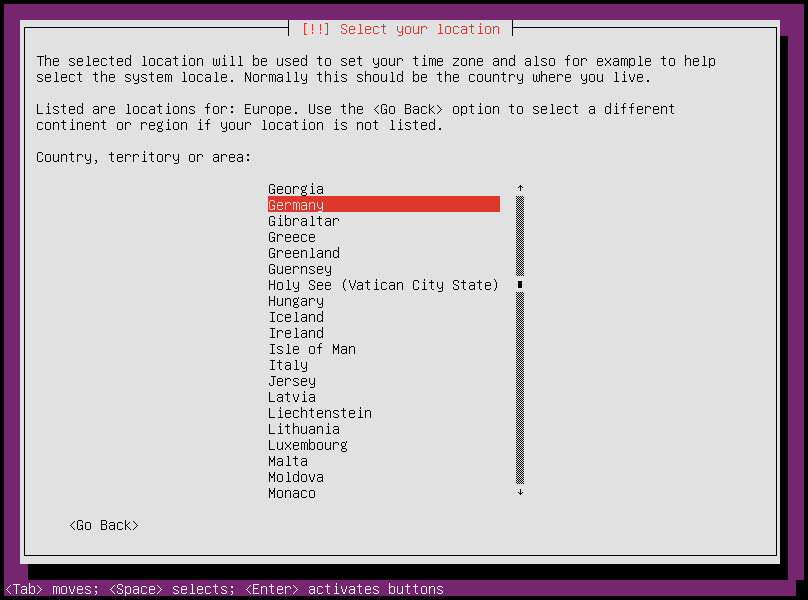
Select your country, e.g. Europe/Germany
Choose
en_US.UTF-8as locale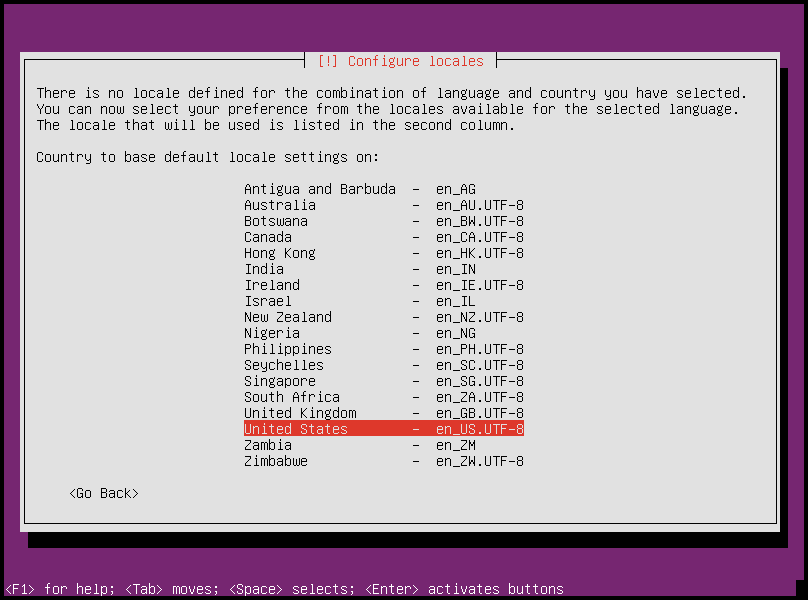
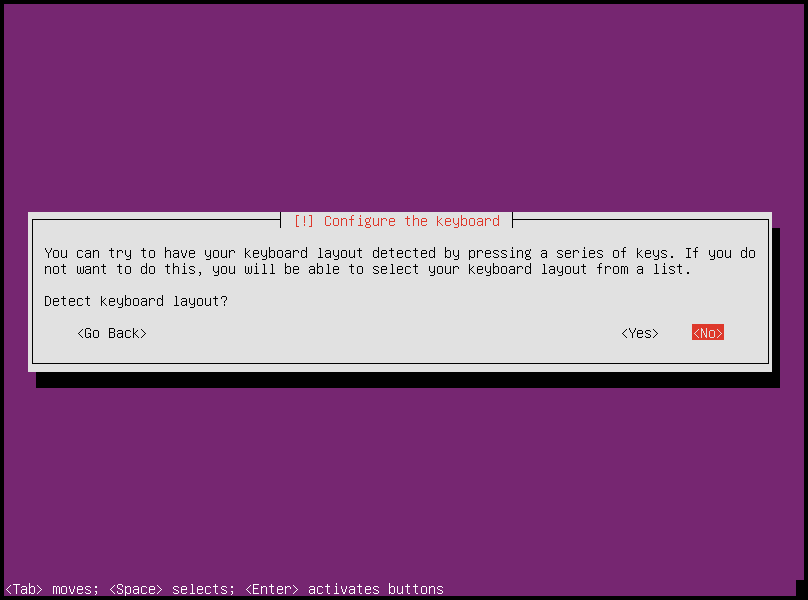
Do not detect Keyboard layout
Choose Keyboard Country
English (US)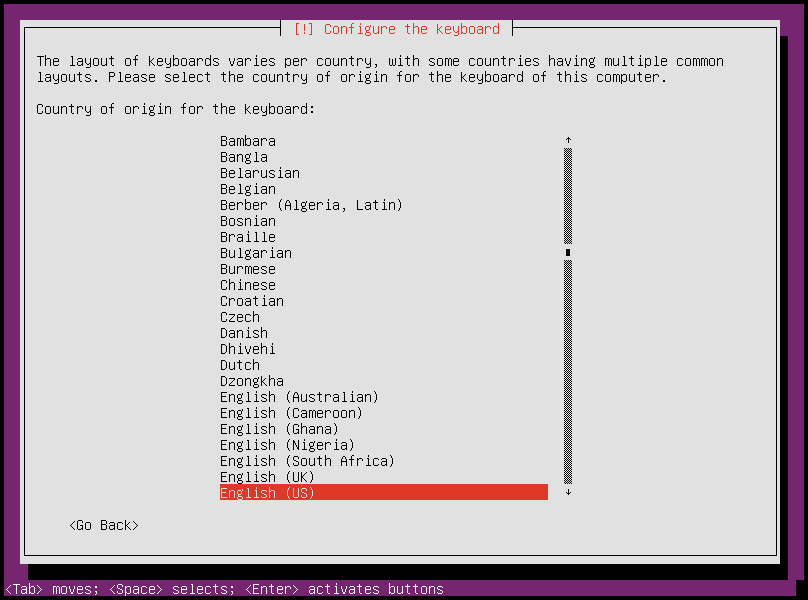
Keyboard layout
English (US)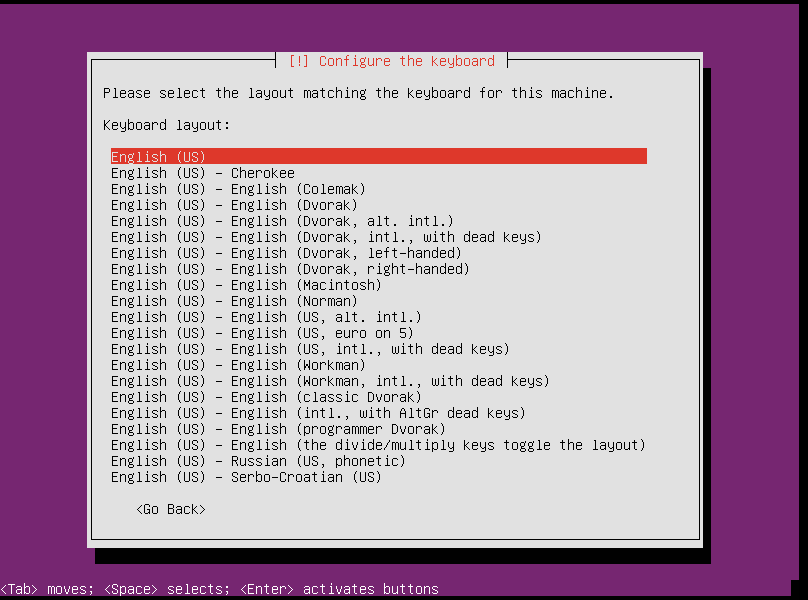
Choose your Hostname, e.g. node, manager, compute, controller, ctrl, com, sto, …
Full name of User,
osism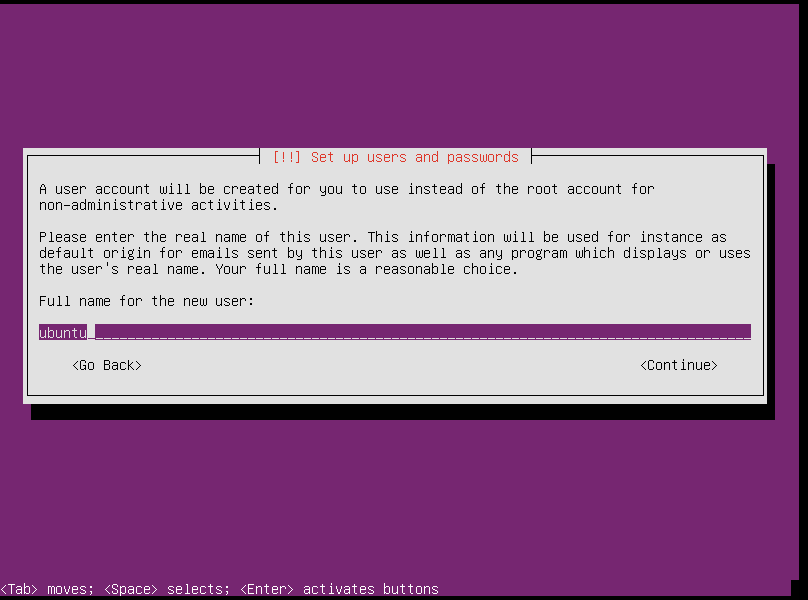
username
osism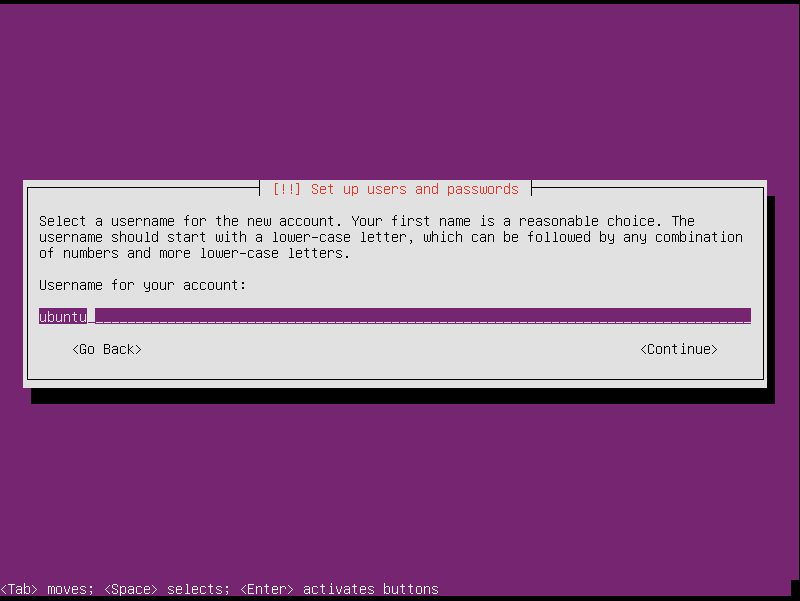
Set password
Set Timezone, e.g.
Europe/Berlin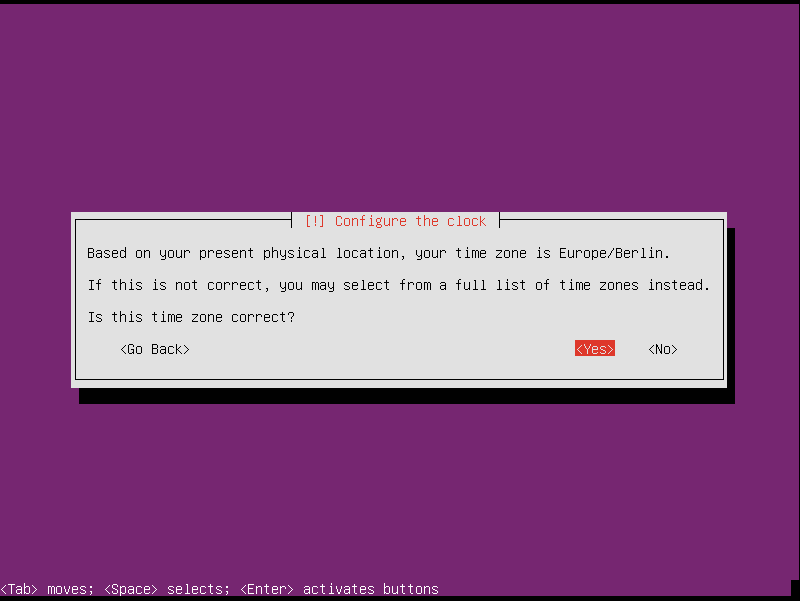
Partitioning - Choose the
Guided - use entire disk and set up LVMentry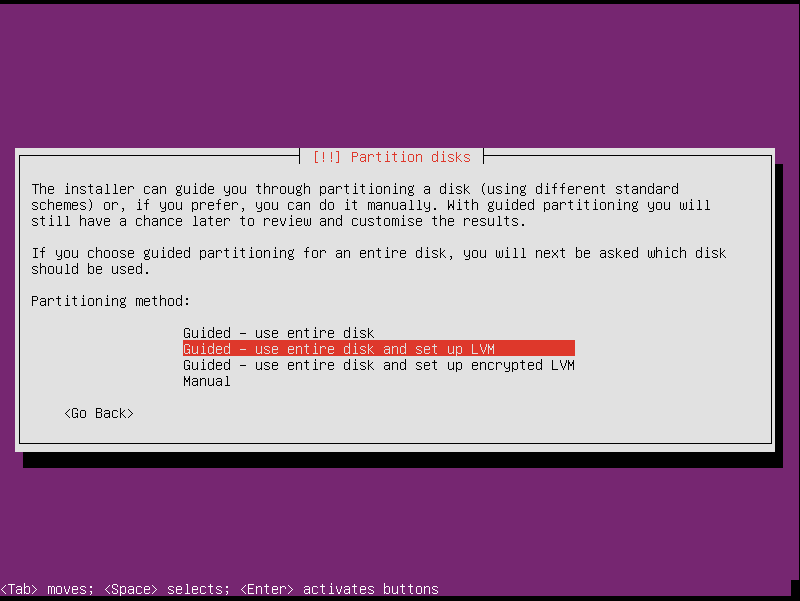
Choose the first disk
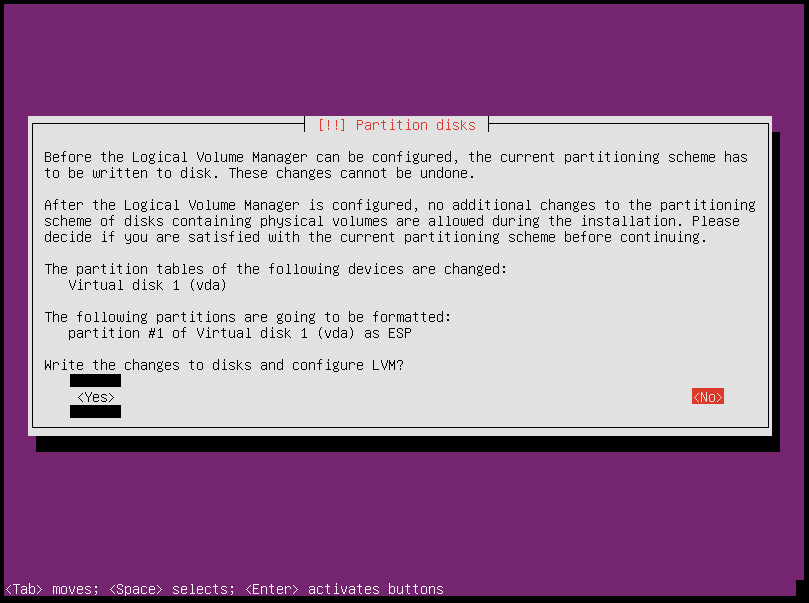
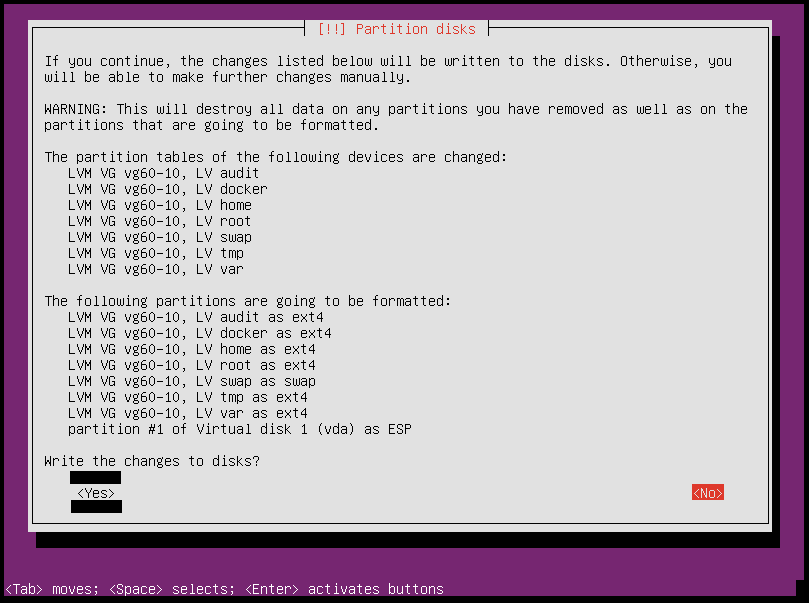
Write the changes to disk
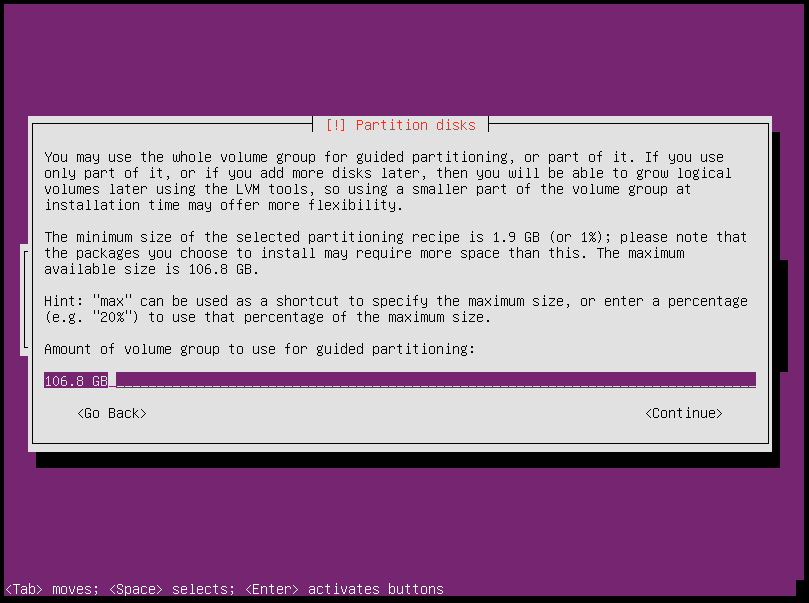
Continue with the suggested value
Configure the Logical Volume Manager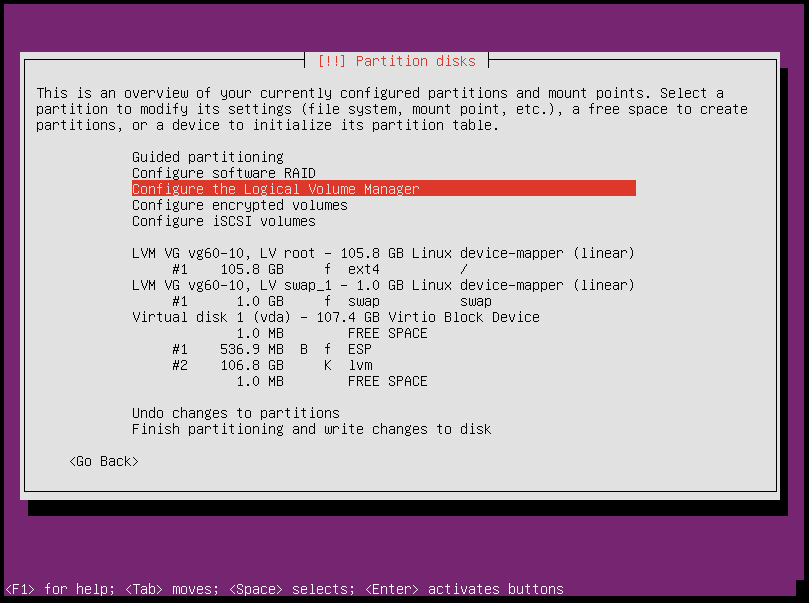
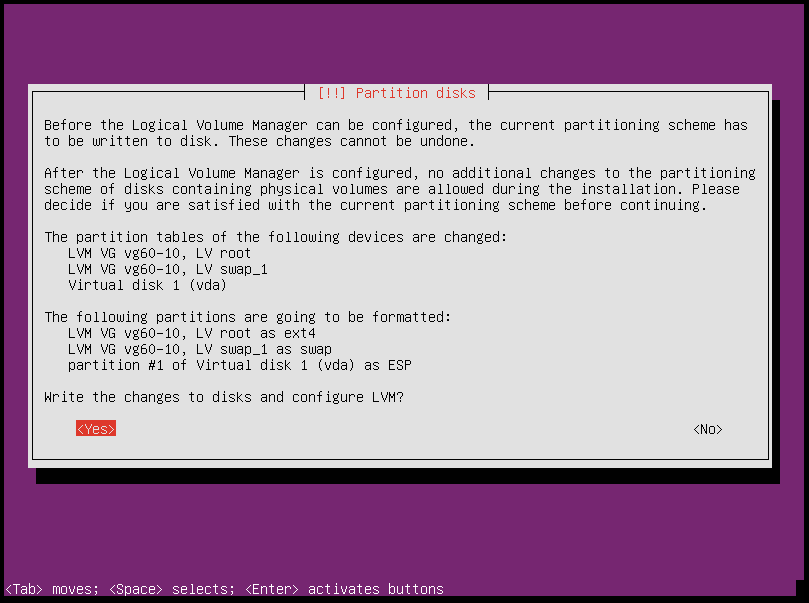
Write the changes to disk
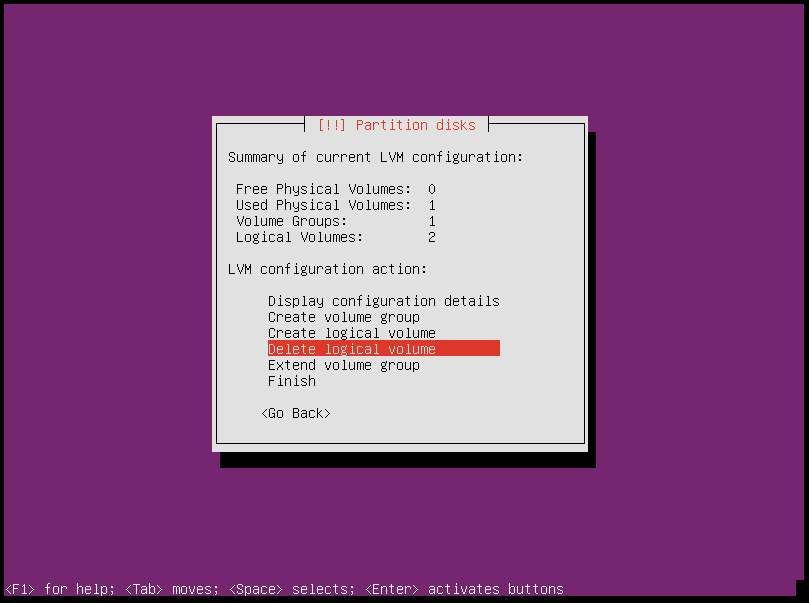
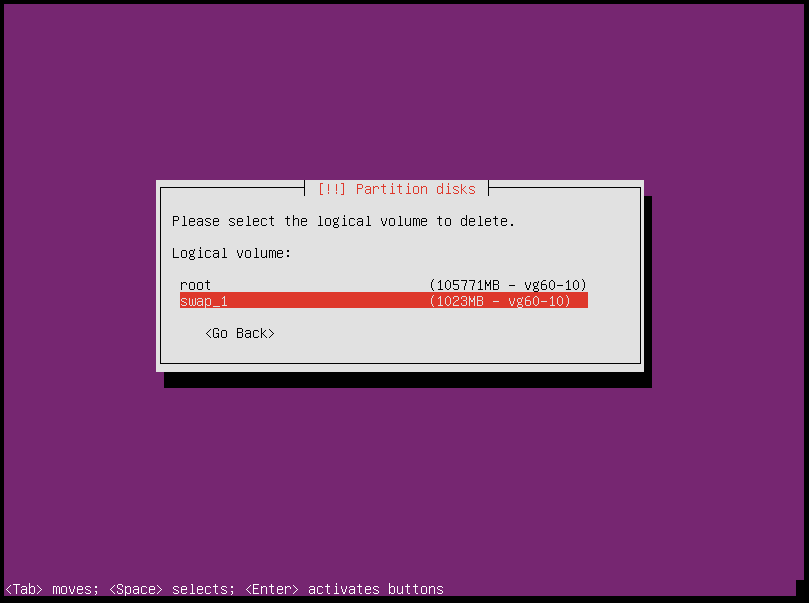
Delete all suggested Logical Volumes
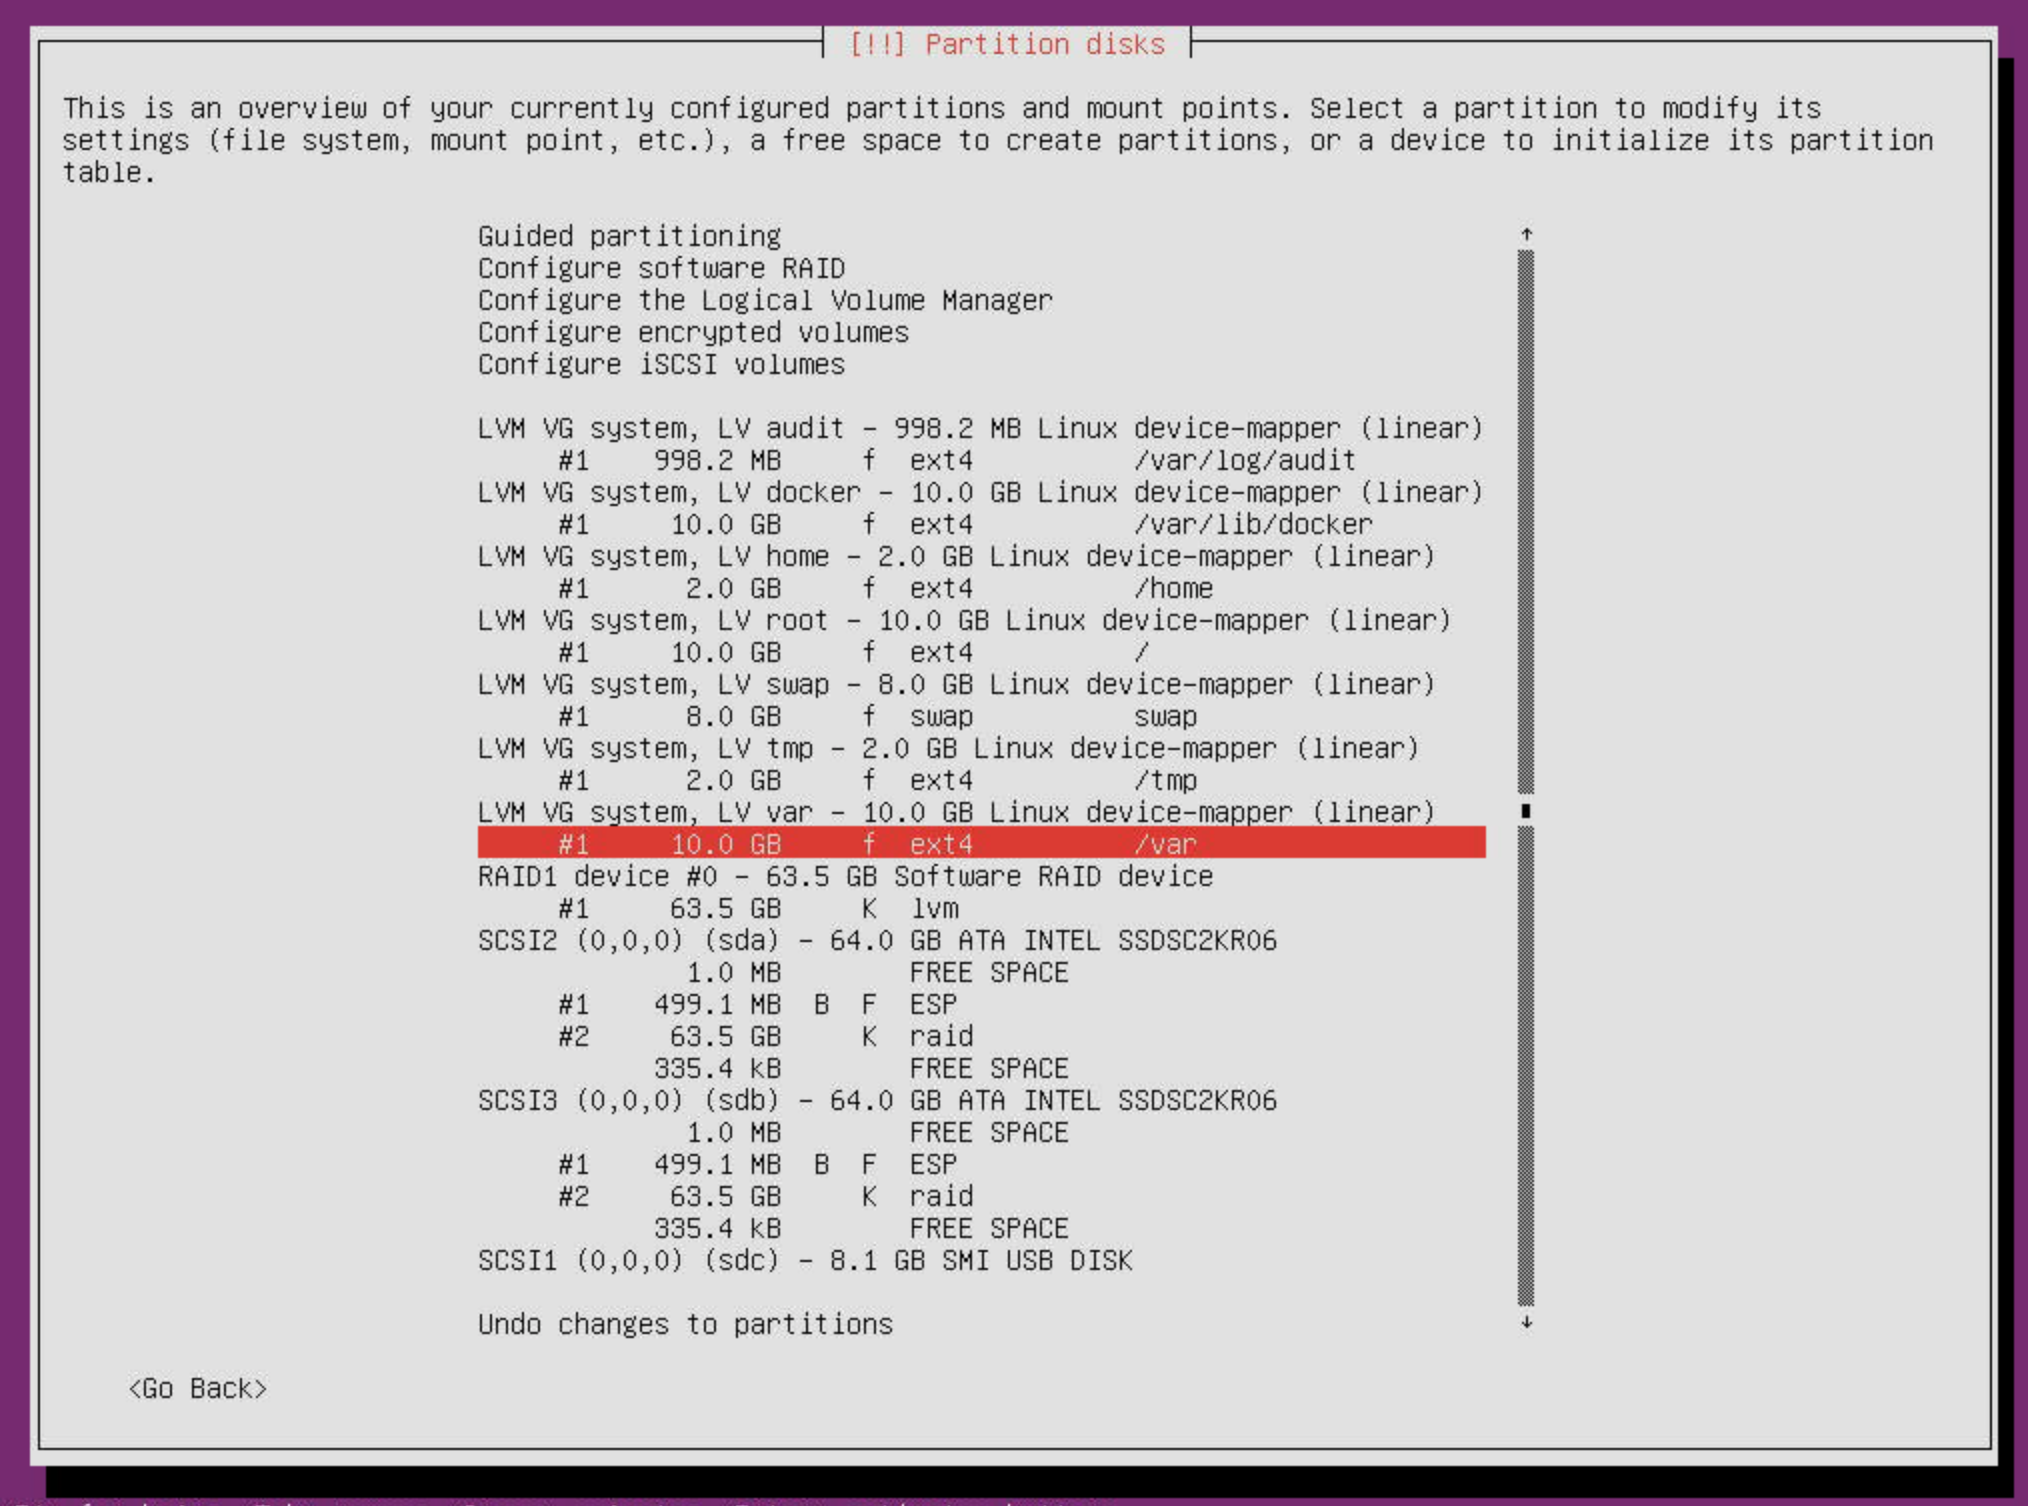
Create LVs like here Node Partitioning with ext4

For
swapLV useswap area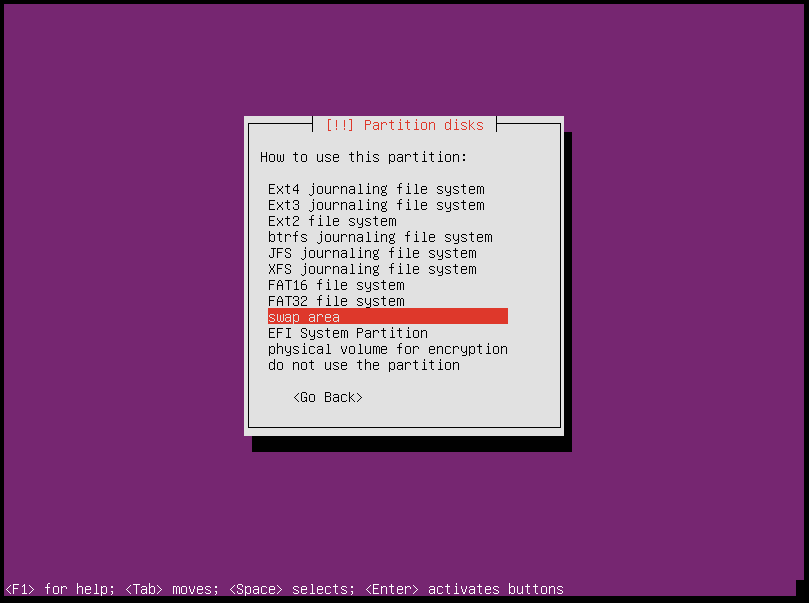
The partitioning should look like this
Write the changes to disk
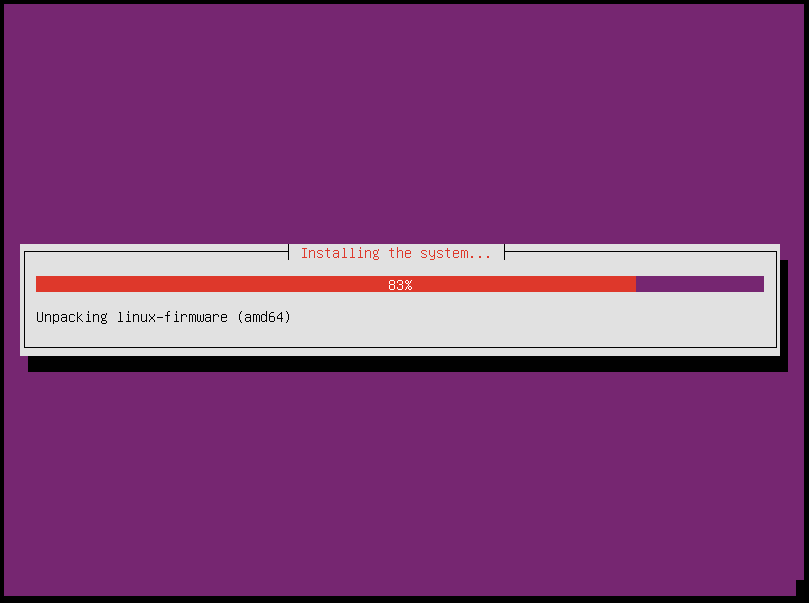
Installation will be started
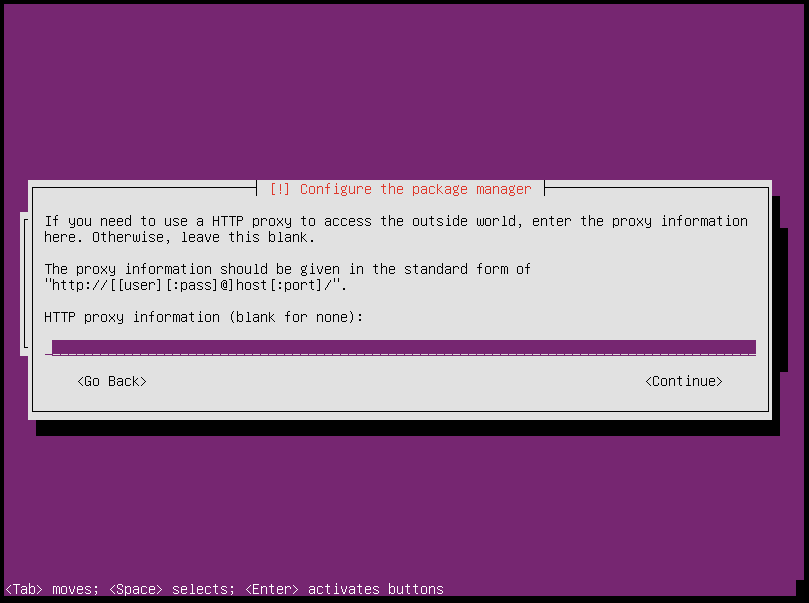
Proxy?
Choose
No automatic updates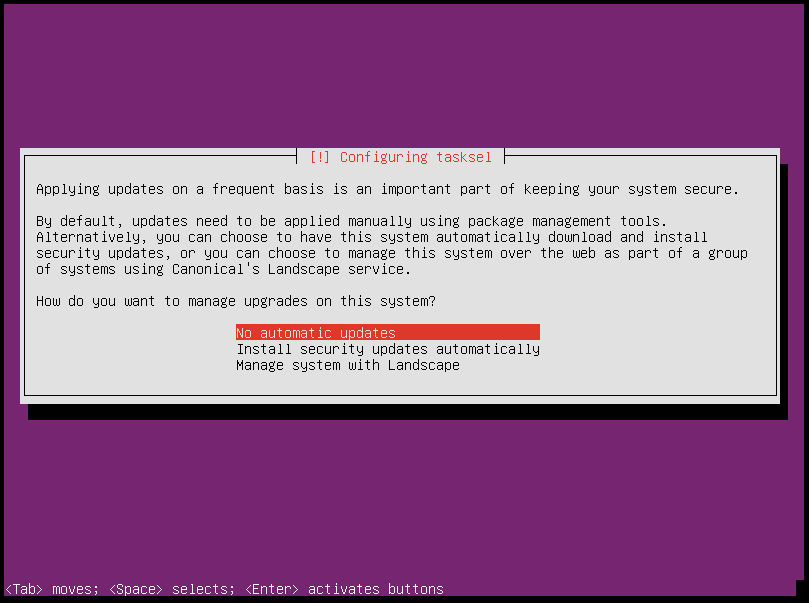
Choose
OpenSSH serverto install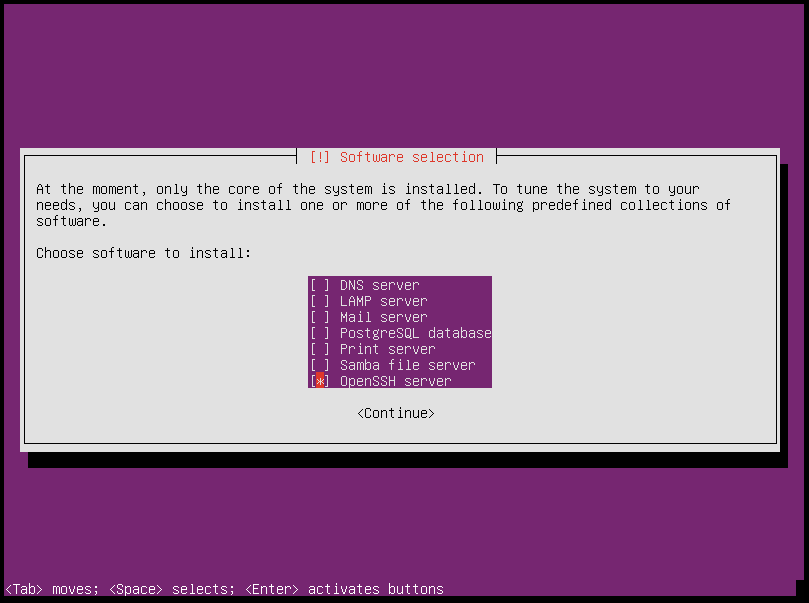
After finished installation, choose
Continuefor reboot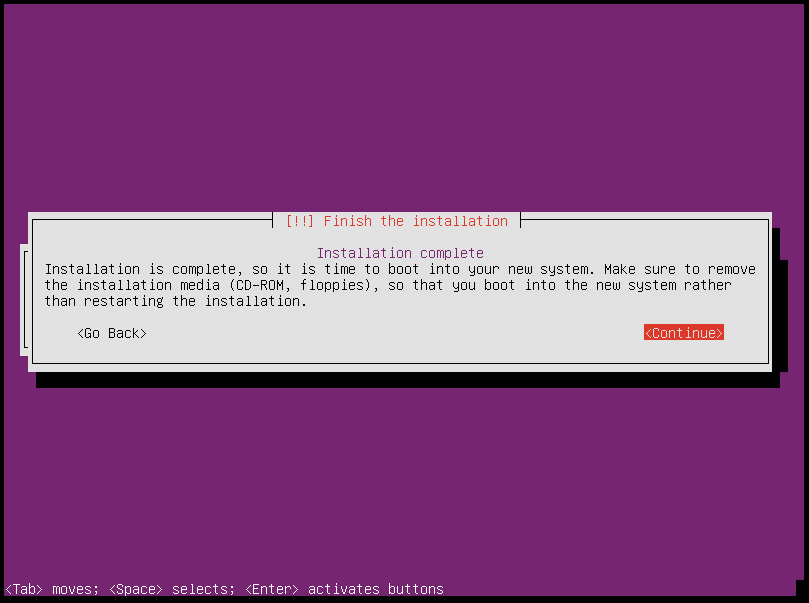
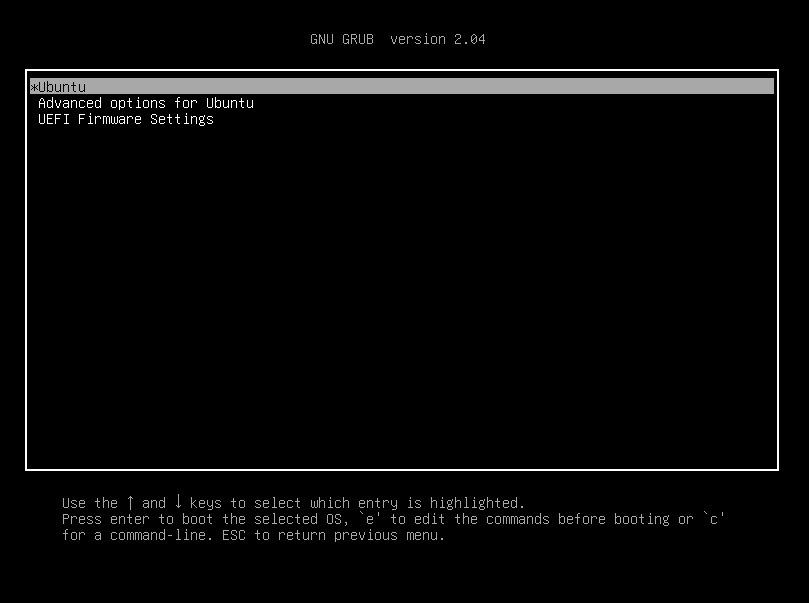
After reboot the installed Grub looks like this
Finaly the login prompt appears

Post-processing
EFI partitions
# lsblk
NAME                MAJ:MIN RM  SIZE RO TYPE  MOUNTPOINT
sda                   8:0    0 59.6G  0 disk
├─sda1                8:1    0  476M  0 part  /boot/efi
└─sda2                8:2    0 59.2G  0 part
  └─md0               9:0    0 59.1G  0 raid1
    ├─system-root   253:0    0  9.3G  0 lvm   /
    ├─system-swap   253:1    0  7.5G  0 lvm   [SWAP]
    ├─system-tmp    253:2    0  1.9G  0 lvm   /tmp
    ├─system-audit  253:3    0  952M  0 lvm   /var/log/audit
    ├─system-var    253:4    0  9.3G  0 lvm   /var
    ├─system-docker 253:5    0  9.3G  0 lvm   /var/lib/docker
    └─system-home   253:6    0  1.9G  0 lvm   /home
sdb                   8:16   0 59.6G  0 disk
├─sdb1                8:17   0  476M  0 part
└─sdb2                8:18   0 59.2G  0 part
  └─md0               9:0    0 59.1G  0 raid1
    ├─system-root   253:0    0  9.3G  0 lvm   /
    ├─system-swap   253:1    0  7.5G  0 lvm   [SWAP]
    ├─system-tmp    253:2    0  1.9G  0 lvm   /tmp
    ├─system-audit  253:3    0  952M  0 lvm   /var/log/audit
    ├─system-var    253:4    0  9.3G  0 lvm   /var
    ├─system-docker 253:5    0  9.3G  0 lvm   /var/lib/docker
    └─system-home   253:6    0  1.9G  0 lvm   /home
# dd if=/dev/sda1 of=/dev/sdb1
# efibootmgr -v | grep ubuntu
Boot0000* ubuntu     HD(1,GPT,f6b80cef-a636-439a-b2c2-e30bc385eada,0x800,0xee000)/File(\EFI\UBUNTU\SHIMX64.EFI)
Boot0018* ubuntu     HD(1,GPT,f6b80cef-a636-439a-b2c2-e30bc385eada,0x800,0xee000)/File(\EFI\UBUNTU\GRUBX64.EFI)
# efibootmgr -c -d /dev/sdb -p 1 -L "ubuntu2" -l "\EFI\UBUNTU\GRUBX64.EFI"
# efibootmgr -c -d /dev/sdb -p 1 -L "ubuntu2" -l "\EFI\UBUNTU\SHIMX64.EFI"
Network
After the first boot depending on the environment it is necessary to create the network configuration for the management interface manually, because for example bonding or VLANs should be used.
The following examples shows how the configuration can be done with netplan or iproute2.
Note
The examples are not the final network configuration. It is a minimal sample network configuration for initial access to the systems.
The example configuration differs depending on the environment. The configuration is not a recommendation for the network design. It’s just an example configuration.
It is not necessary to manually create the finale network configuration. The final network configuration of the environment is defined during the creation of the configuration repository. The network final network configuration is depoyed during the bootstrap on the systems.
iproute2
# modprobe bonding
# ip link add bond0 type bond
# ip link set bond0 type bond miimon 100 mode 802.3ad lacp_rate 1
# ip link set eno1 down
# ip link set eno1 master bond0
# ip link set eno2 down
# ip link set eno2 master bond0
# ip link set bond0 up
# cat /proc/net/bonding/bond0
# ip link add link bond0 name vlan101 type vlan id 101
# ip link set vlan101 up
# ip address add 172.17.60.10/16 dev vlan101
# ip route add default via 172.17.40.10
You may have to set the nameservers in
/etc/resolv.conf. Temporarily remove the127.0.0.53entry.
Netplan
configure
/etc/netplan/01-netcfg.yaml
---
network:
  version: 2
  renderer: networkd
  ethernets:
    eno1:
      dhcp4: no
    eno2:
      dhcp4: no
  bonds:
    bond0:
      dhcp4: no
      interfaces:
        - eno1
        - eno2
      parameters:
        mode: 802.3ad
        lacp-rate: fast
        mii-monitor-interval: 100
  vlans:
    vlan101:
      id: 101
      link: bond0
      addresses: [ "172.17.60.10/16" ]
      routes:
       - to: 0.0.0.0/0
         via: 172.17.40.10
      nameservers:
        search: [ betacloud.xyz ]
        addresses: [ "8.8.8.8", "8.8.4.4" ]
# netplan apply
ACPI Error
If you see this messages in dmesg, logs or journal
ACPI Error: SMBus/IPMI/GenericSerialBus write requires Buffer of length 66, found length 32 (20150930/exfield-418)
ACPI Error: Method parse/execution failed [\_SB.PMI0._PMM] (Node ffff8807ff5bd438), AE_AML_BUFFER_LIMIT (20150930/psparse-542)
ACPI Exception: AE_AML_BUFFER_LIMIT, Evaluating _PMM (20150930/power_meter-338)
blacklist and unload kernel module acpi_power_meter.